How to Remove Sticker Residue Without Damaging Surfaces: 9 Safe Methods
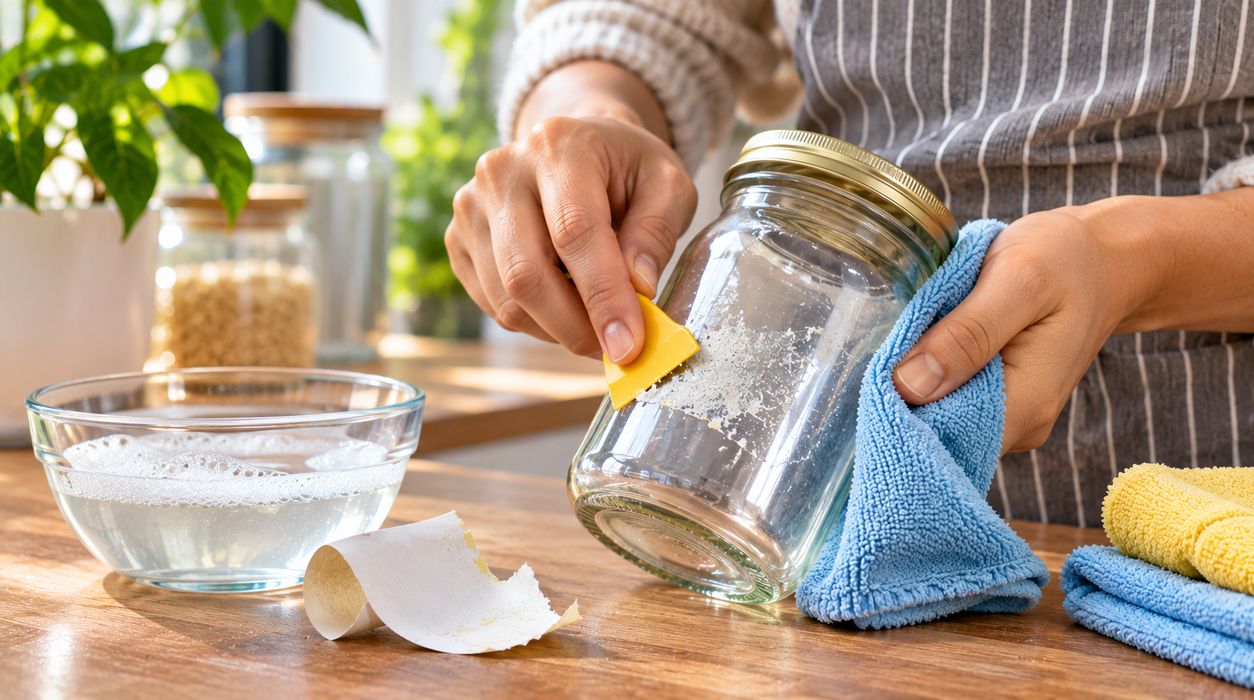
You peel a price tag off a new glass jar, remove an old label from a plastic container, or take a sticker off a piece of furniture. The sticker comes away, but a stubborn patch of sticky glue remains.
You rub it with your finger. It spreads. You try scraping it, and suddenly you’re worried about scratching the surface.
Knowing how to remove sticker residue without damaging surfaces can help you avoid permanent marks, cloudy plastic, damaged finishes, and unnecessary frustration.
The safest approach depends on what the adhesive is attached to. A cleaning method that works beautifully on glass may damage painted wood, plastic, or an electronic device.
In this guide, you’ll learn nine practical methods for removing sticky residue, how to choose the right method for different materials, and which common cleaning mistakes to avoid.
Quick Answer: What Removes Sticker Residue Safely?
For many washable, nonporous household surfaces, start with warm water, a little mild dish soap, and a soft microfiber cloth.
If the adhesive remains, you may be able to use a plastic scraper, a small amount of oil, or a surface-compatible adhesive remover.
Follow these basic rules:
- Identify the surface material before cleaning.
- Start with the least aggressive method.
- Test products on a hidden area.
- Avoid sharp metal tools on scratch-prone surfaces.
- Do not apply excessive heat to plastic or painted finishes.
- Follow product and manufacturer instructions.
- Remove cleaning-product residue afterward.
- Dry the surface completely.
Important: No single adhesive-removal method is guaranteed safe for every surface.
Why Does Sticker Residue Stay Behind?
Most stickers use pressure-sensitive adhesives that bond to a surface when pressure is applied.
The adhesive is designed to hold the label in place while allowing some flexibility.
Over time, factors such as temperature, sunlight, pressure, and aging can change how the adhesive behaves.
When you peel away the sticker, the paper or plastic backing may separate while some adhesive remains attached.
Why Older Stickers Are Harder to Remove
Older labels may become brittle, tear into small pieces, or leave hardened adhesive.
Heat exposure and long-term contact can also make some residues more difficult to remove.
Why Does the Glue Feel Sticky After Cleaning?
Sometimes rubbing spreads the adhesive into a thinner layer instead of lifting it.
This is why using a suitable cleaning agent and gently collecting the softened residue is often more effective than aggressive scrubbing.
1. Start With Warm Soapy Water
Warm water and mild dish soap are a sensible first choice for many washable surfaces.
This method is inexpensive and generally less aggressive than strong solvents.
How to Use It
- Mix a small amount of mild dish soap into warm water.
- Dampen a soft cloth with the solution.
- Hold the cloth against the residue briefly.
- Gently rub the adhesive.
- Lift loosened material with the cloth.
- Rinse if the surface permits.
- Dry with a clean towel.
Best Surfaces
This method is often suitable for:
- Glass jars
- Ceramic dishes
- Stainless steel
- Some plastic containers
- Washable sealed surfaces
When to Avoid It
Do not soak electronics, unfinished wood, unsealed stone, or moisture-sensitive materials.
For furniture and specialty finishes, consult the manufacturer’s cleaning instructions.
The label manufacturer Avery recommends gentle soap-and-water cleaning as one approach to adhesive residue removal, along with testing cleaning solutions on an inconspicuous area.
2. Use a Plastic Scraper or Old Gift Card
If adhesive is sitting on top of a hard surface, a plastic tool may help lift it.
A plastic scraper can be less likely to scratch some surfaces than a metal blade, although damage is still possible.
Step-by-Step Instructions
- Soften the residue with a compatible cleaning method.
- Hold a plastic scraper at a shallow angle.
- Gently push against the edge of the adhesive.
- Lift small sections without forcing the tool.
- Wipe away loosened residue.
- Repeat if necessary.
Best Uses
This technique may work well on:
- Smooth glass
- Certain hard plastics
- Ceramic tiles
- Some metal surfaces
What Should You Avoid?
Do not force a scraper across glossy plastic, delicate paint, or easily scratched coatings.
Even plastic tools can leave marks if dirt becomes trapped underneath them.
3. Try a Small Amount of Cooking Oil
Certain sticker adhesives may soften when exposed to oil.
A small amount of cooking oil can sometimes help loosen residue on compatible surfaces.
However, oil is not appropriate for every material.
How to Try the Oil Method
- Place a small amount of cooking oil on a cloth.
- Test it on an inconspicuous area.
- Apply a little to the sticky residue.
- Allow brief contact.
- Gently rub with the cloth.
- Remove the oil using an appropriate cleaning method.
- Dry the surface.
Where It May Work
Oil may be useful on certain washable glass, metal, or plastic surfaces.
Where It Can Cause Problems
Avoid applying oil to:
- Unfinished wood
- Porous stone
- Unsealed surfaces
- Paper labels you want to preserve
- Fabrics that stain easily
- Electronics
Oil can leave marks on porous materials and may be difficult to remove completely.
If you are uncertain about the surface, skip this method.
4. Use Rubbing Alcohol Only on Compatible Surfaces
Isopropyl alcohol can help loosen certain adhesives, but it may also affect paint, coatings, inks, and some plastics.
It should never be treated as a universal sticker remover.
How to Test It
- Read the surface manufacturer’s cleaning guidance.
- Apply a small amount to a clean cloth rather than pouring it directly onto the object.
- Test a hidden area.
- Stop if the finish becomes cloudy, discolored, or softened.
- If compatible, gently wipe the residue.
- Remove remaining material and allow the surface to dry.
Surfaces That Need Extra Caution
Be especially careful with:
- Acrylic
- Polycarbonate
- Painted furniture
- Lacquered surfaces
- Printed graphics
- Coated screens
What About Electronics?
Do not apply liquid directly to electronic equipment.
Use only cleaning methods specifically approved by the device manufacturer.
Alcohol that is safe for one component may damage another.
5. Use a Commercial Adhesive Remover
When household methods are unsuccessful, a dedicated adhesive remover may be appropriate.
These products are formulated to loosen certain glues, labels, and sticky residues.
However, their surface compatibility varies.
How to Use an Adhesive Remover Safely
- Read the product label.
- Confirm that the surface is listed as compatible.
- Test a small hidden area.
- Apply the product as directed.
- Allow the recommended contact time.
- Wipe away the loosened residue.
- Clean and dry the surface as instructed.
For example, Goo Gone Original’s official instructions identify several compatible surfaces while warning against use on materials such as unfinished wood, unsealed stone, leather, and rubber.
Why Spot Testing Matters
A product that works on finished wood may not be appropriate for unfinished wood.
Similarly, a cleaner suitable for one plastic may affect another.
Never assume that the word “surface-safe” means safe for every material.
6. Apply Gentle Heat When the Material Allows It
Some adhesives become easier to peel when gently warmed.
However, heat can damage finishes, deform plastics, and affect coatings.
How to Use Gentle Heat
Only try this method when the object manufacturer permits it.
If appropriate:
- Use a hair dryer on a low setting.
- Keep it moving rather than concentrating heat in one spot.
- Warm the sticker briefly.
- Test whether an edge lifts easily.
- Peel slowly without forcing the adhesive.
- Stop immediately if the surface becomes unusually warm or shows any change.
When Not to Use Heat
Avoid heat on:
- Heat-sensitive plastics
- Electronic screens
- Delicate painted finishes
- Thin vinyl
- Certain laminated surfaces
- Materials with unknown heat tolerance
Some decorative films have special removal requirements. Follow the manufacturer’s instructions rather than applying heat automatically.
7. Lift Fresh Residue With Adhesive Tape
For small amounts of fresh, tacky residue, tape may sometimes help lift adhesive particles.
This technique works by allowing one adhesive surface to pick up another.
How to Try It
- Choose a low-tack tape suitable for the surface.
- Test it on a hidden area.
- Lightly press it against the sticky residue.
- Lift it carefully.
- Repeat only if it is working without damaging the finish.
Important Warning
Tape can lift paint, printed coatings, paper fibers, or delicate finishes.
Avoid using strong packing tape or duct tape on sensitive surfaces.
This method is best reserved for durable materials where adhesion testing indicates minimal risk.
8. Soak Removable Glass or Ceramic Items
If you are removing a label from a glass jar or a suitable ceramic container, soaking can help soften paper labels and some adhesives.
How to Do It
- Check that the item can safely be immersed.
- Fill a basin with warm, soapy water.
- Place the item in the water.
- Allow the label to soften.
- Gently peel away the paper.
- Remove remaining residue with a soft cloth.
- Rinse and dry thoroughly.
What About Decorated Glass?
Avoid soaking items with delicate painted designs, glued decorations, or special coatings unless the manufacturer allows it.
Can You Use Boiling Water?
Boiling water is unnecessary for routine sticker removal and can cause burns or thermal stress in some materials.
Warm water is a safer starting point.
9. Use a Surface-Specific Removal Product for Difficult Jobs
Some stickers require a more specialized approach.
Examples include:
- Automotive decals
- Window films
- Industrial labels
- Heavy-duty mounting tape
- Old adhesive on finished furniture
A product designed for one application may not be suitable for another.
For instance, 3M’s adhesive remover guidance describes an automotive product intended for adhesive removal on compatible cured paint and certain other surfaces.
This does not mean that automotive adhesive removers should be used on household furniture or electronic devices.
When to Seek Professional Help
Consider professional assistance when residue is attached to:
- Valuable antique furniture
- Expensive automotive finishes
- Delicate artwork
- Specialty architectural coatings
- Sensitive electronic components
Replacing a damaged finish may cost far more than obtaining appropriate advice.
How to Remove Sticker Residue From Different Surfaces
The safest method depends on the material.
| Surface | Reasonable Starting Method | Main Precaution |
|---|---|---|
| Glass | Warm soapy water and soft cloth | Check for coatings or decorative finishes |
| Plastic | Mild soap and gentle wiping | Avoid incompatible solvents and heat |
| Finished wood | Manufacturer-approved cleaner | Protect the finish |
| Unfinished wood | Dry, gentle methods; specialist advice | Avoid soaking and oils |
| Stainless steel | Mild soap and microfiber cloth | Avoid scratching and abrasive pads |
| Painted surfaces | Gentle cleaning and spot testing | Paint may lift or discolor |
| Ceramic | Warm soapy water | Check for decorative coatings |
| Electronics | Device-approved cleaning method | Prevent liquid intrusion |
How to Remove Sticker Residue From Glass
Glass is often easier to clean than more delicate materials, but not every glass surface is identical.
Decorative coatings, tinting, and printed finishes may require special care.
Step-by-Step
- Apply warm soapy water if the surface permits.
- Let the residue soften.
- Wipe gently with microfiber.
- Use a compatible plastic scraper if necessary.
- Rinse and dry.
Avoid aggressive scraping on coated glass.
Can You Use a Razor Blade?
Metal blades may scratch coatings and can cause injury.
For ordinary household cleaning, a plastic scraper is usually a more cautious starting point.
Use specialized tools only when explicitly recommended for the particular glass surface.
How to Remove Sticker Residue From Plastic
Plastic requires more caution than many people expect.
Different plastics react differently to solvents and heat.
Safe Starting Approach
Use mild dish soap and a soft cloth.
If the residue remains, check whether the manufacturer approves a particular adhesive remover.
Always spot-test first.
Why Does Plastic Sometimes Turn Cloudy?
Certain chemicals can affect plastic surfaces, producing haze, discoloration, or other damage.
Excessive friction can also create scratches that make plastic appear dull.
What Should You Avoid?
Avoid unapproved acetone, strong solvents, abrasive pads, and concentrated heat.
These methods can permanently damage some plastics.
How to Remove Sticker Residue From Wood
Wood furniture may have a protective finish, or it may be unfinished.
That distinction matters.
Finished Wood
For finished wood, start with a slightly damp cloth if the manufacturer permits it.
Dry the area promptly.
If residue remains, use only a product approved for that finish.
Unfinished Wood
Unfinished wood is more vulnerable to staining and moisture absorption.
Avoid soaking, oils, and general-purpose solvents without specialist guidance.
Why Wood Finishes Need Special Care
A solvent may remove the adhesive but also soften or strip the furniture finish.
The surface may look clean initially while developing dullness or discoloration afterward.
How to Remove Sticker Residue From Metal
Many household metal surfaces can be cleaned using mild soap and a soft cloth.
However, painted, coated, or brushed metals may require additional precautions.
Stainless Steel
Start with mild detergent and microfiber.
Avoid harsh abrasive pads.
If the surface has a visible grain, clean gently in the direction recommended by the manufacturer.
Painted Metal
Treat painted metal more like a painted surface than bare metal.
Check compatibility before using any solvent.
How to Remove Sticker Residue From Clothing
Adhesive can transfer from name tags, price labels, or decorative stickers onto fabric.
Removing it requires attention to the care label and fabric type.
A Cautious Approach
- Check the garment care label.
- Remove loose sticker material gently.
- Test a fabric-compatible cleaning product.
- Follow the product’s instructions.
- Launder as directed.
- Check the stain before tumble drying.
Avoid using a dryer until you know whether the residue has been removed, because heat may make some stains harder to treat.
Why Fabric Type Matters
Silk, wool, synthetic performance fabrics, and delicate finishes may react differently to cleaning products.
Do not assume that a remover suitable for cotton is safe for every garment.
Related Grandloopy article: Why Do Clothes Smell Musty After Washing?
Publication note: Confirm that this article URL is live before using the link on your website.
How to Remove Sticker Residue Without Scratching the Surface
Preventing scratches is just as important as removing the glue.
Use Soft Cleaning Materials
Microfiber cloths and appropriate nonabrasive tools are usually better starting points than rough sponges or metal scrapers.
Avoid Excessive Pressure
If residue does not lift easily, stop and reconsider the method.
Scrubbing harder can damage the surface without removing the adhesive.
Remove Dirt First
Tiny particles of grit can become trapped under a cloth or scraper.
Clean away loose dirt before working on sticky residue.
Work in Small Sections
Treating a small area makes it easier to monitor the finish and stop if damage begins.
For more practical home-cleaning ideas, explore Grandloopy’s Blog section.
What Should You Never Use to Remove Sticker Residue?
Some cleaning methods are unnecessarily aggressive for routine household surfaces.
Acetone Without Confirmed Compatibility
Acetone can damage certain plastics, paints, and finishes.
Sharp Metal Tools
These can scratch surfaces and cause cuts.
Excessive Heat
High temperatures can deform plastic and damage coatings.
Abrasive Cleaning Pads
Rough pads can leave visible scratches.
Unapproved Chemical Mixtures
Mixing household chemicals can create dangerous reactions.
Never mix bleach with ammonia, acids, or other cleaning products.
Excessive Water
Water can damage electronics, unfinished wood, and other moisture-sensitive materials.
Why Does Sticker Residue Become Harder to Remove Over Time?
Sticker adhesives can change as they age.
Heat, sunlight, and environmental exposure may affect how the adhesive bonds to a surface.
The backing material can also become brittle.
How to Handle Old Labels
Start gently.
Avoid pulling forcefully when the sticker begins tearing.
If the surface allows it, soften the label with an appropriate method before attempting to lift it.
Should You Scrape Old Glue Immediately?
Not necessarily.
Softening the adhesive first may reduce the need for aggressive scraping.
How to Prevent Sticker Residue in the Future
Although some labels are difficult to remove regardless of technique, careful handling can help.
Peel Slowly
Lift one edge and pull gradually.
Avoid Excessive Force
If the label tears, stop and reassess.
Check Manufacturer Instructions
Some products include recommended label-removal methods.
Remove Temporary Labels Promptly
Labels left in place for long periods may become more difficult to remove, depending on the adhesive and environmental conditions.
Keep Surfaces Clean
A clean surface is easier to inspect and maintain.
If you’re also dealing with dust buildup around furniture and household objects, see Why Does My Bedroom Get Dusty So Quickly?.
Publication note: Verify this URL before publishing the internal link.
Common Sticker Removal Mistakes
Mistake 1: Using the Strongest Chemical First
Start with the least aggressive suitable method.
Mistake 2: Skipping the Spot Test
A hidden-area test can reveal discoloration or damage before it affects a visible surface.
Mistake 3: Applying Heat to Every Surface
Heat-sensitive materials may warp or lose their finish.
Mistake 4: Scraping Too Hard
Excessive force can create permanent scratches.
Mistake 5: Ignoring Product Instructions
Adhesive removers have different compatibility limits and application methods.
Mistake 6: Leaving Cleaning Product Behind
Residue from oils or cleaning agents may attract dirt or leave the surface slippery.
Mistake 7: Treating All Plastics the Same
Different plastics can react differently to the same solvent.
Mistake 8: Using Household Solvents on Electronics
Sensitive coatings and internal components can be damaged.
Frequently Asked Questions
What is the easiest way to remove sticker residue?
For many washable surfaces, warm soapy water and a soft cloth are reasonable first steps.
Can vinegar remove sticker residue?
Vinegar may affect some residues, but it is not appropriate for every surface. Check compatibility and avoid using it on acid-sensitive materials.
Does rubbing alcohol remove sticker glue?
It can loosen certain adhesives, but it may damage coatings, paint, or some plastics. Always confirm compatibility.
Is cooking oil safe for removing stickers?
It may help on certain washable surfaces, but it can stain porous materials and should not be used indiscriminately.
How do I remove sticker residue from glass?
Try warm soapy water and gentle wiping first. Be careful with coated or decorated glass.
How do I remove sticker residue from plastic without scratching it?
Use mild soap, a soft cloth, and minimal pressure. Avoid unapproved solvents and abrasive tools.
Can I use a hair dryer to remove stickers?
Gentle heat may help with some adhesives, but only use it when the material and manufacturer permit it.
Does adhesive remover damage wood?
Some products are compatible with certain finished wood surfaces, but unfinished wood and delicate finishes may be damaged.
How do I remove old price-tag glue?
Start with a gentle cleaning method, soften the residue if appropriate, and use a surface-compatible remover if needed.
Why does sticker glue spread when I rub it?
Some adhesives smear under friction rather than lifting cleanly. A compatible cleaning method may help loosen and collect the residue.
Final Thoughts
Learning how to remove sticker residue without damaging surfaces starts with choosing the right method for the material.
Warm soapy water and a soft cloth are sensible first steps for many washable household items.
For more stubborn residue, plastic scrapers, carefully selected cleaning agents, or surface-specific adhesive removers may help.
The most important rule is to avoid unnecessary force and test any unfamiliar method before using it on a visible area.
With patience, proper cleaning materials, and attention to surface compatibility, you can remove many everyday sticker residues while protecting the items underneath.
For additional household maintenance and practical lifestyle guides, explore Grandloopy’s home and everyday living articles.

Ryan Mitchell is a passionate writer and digital content creator dedicated to sharing insightful, engaging, and informative articles across multiple niches. With a strong interest in technology, lifestyle, trending topics, and online media, Ryan Mitchell focuses on delivering well-researched and reader-friendly content that inspires and informs audiences worldwide.